In the future, all our fieldwork will be done by robots while we play around on our hover-boards. In anticipation of this, I have written a program for the robots to follow. Until that day arrives, it is also a handy checklist for human beings. It assumes that future robot programming languages will look a lot like English, and pays special attention to notebook layout and how to geotag photos.
def fieldworkPlan():
- Before you go:
- makeSureYouHaveTheRightKit()
- prepareYourKit()
- For each day in the field:
- Write the date and the day’s aims in your notebook
- For each locality visited:
- dataCollectingRoutine()
- endOfDayRoutine()
- postTripRoutine()
def makeSureYouHaveTheRightKit():
- Notebook
# I like the Rite in the Rain with Metric Grid.
# They’re not cheap, but they are really tough and, with a pencil, you can literally write through rain drops.
# The metric grid pattern is handy for lining up logs, but easily ignored for sketches. - Fieldwork gear:
- Sample bags
- Marker pen
- Hand lens
- Ruler / tape measure
- Hammer (+ glasses) / spade / trowel
- Camera
# I like to have a waterproof/dustproof compact that I don’t need to worry about getting wet or dirty.
# I decided that built-in GPS was an unnecessary expense.
# The Panasonic DMC-FT25 is a pretty good example, and not too expensive these days.
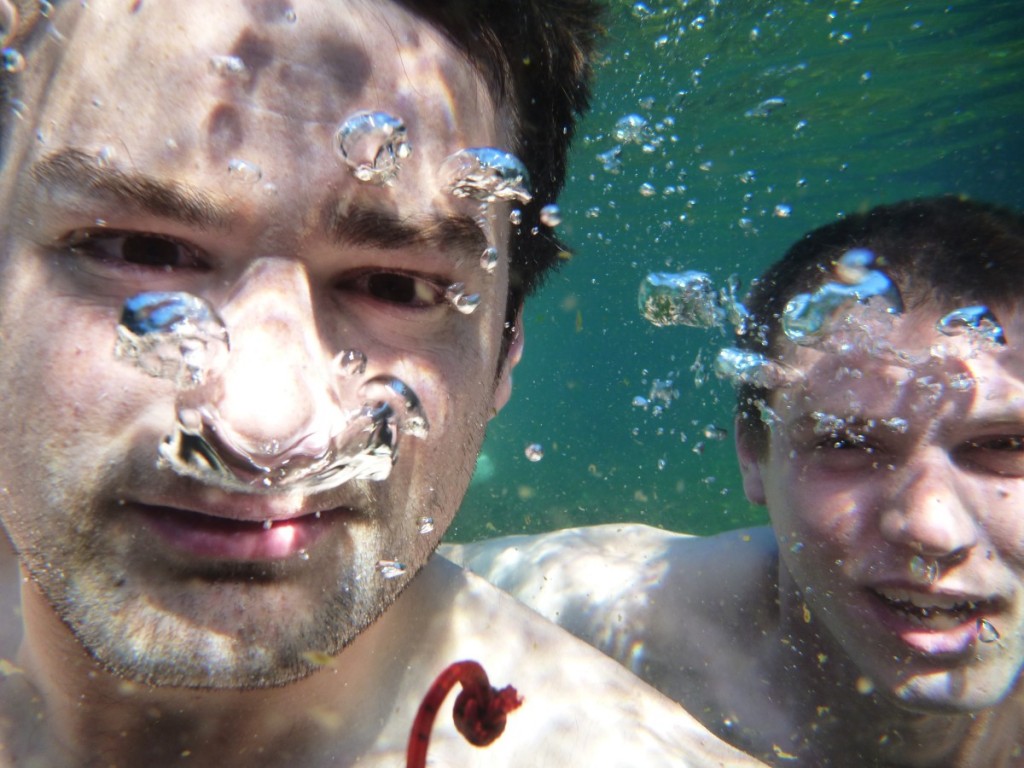
# It lets you take pictures like this in geothermal pools…
- GPS (with cable)
# The most basic Garmin eTrex is ideal, as I only want the GPS for two purposes.
# (1) To record waypoints at each location I make observations.
# (2) To record time-stamped track of where I go.
# I then correlate this with the timestamp of my photos, which lets me geotag (embed the photo’s location into the file).
# The most important thing is that you can easily get the data onto a computer.
# You can also use smartphones with software such as MyTracks (on Android) or Strava that can exports tracks as .gpx files.
# I find this uses the phone’s battery very quickly. - Software:
- gpsbabel
# This is open source software that reads data from your GPS and can convert it between various formats - GpsPrune
# This is open source software for editing GPS data.
# We will use it to geotag our photos.
# To do this, gpsbabel and exiftools also need to be installed.
# It also lets you view geotagged photos by location. - Photo cataloguing software
# e.g. Shotwell, Picasa, iPhoto.
# These are very useful because you can browse photos across folders based on their dates.
# You can also tag photos e.g. ‘notebook’, ‘logged section’.
# Some allow you to view geotagged photos on a map.
- gpsbabel
- Suitable field clothing
# See my Volcano suit / What to wear in Iceland post.
def prepareYourKit():
- Notebook
# Write contact details in the front in case you lose it.
# Write useful notes for reference in the back, such as grain size definitions for logging or a key for different symbols in logs. - Camera
# Synchronise the clock with your GPS - GPS
# Set the coordinate system to whatever system your maps use.
# It doesn’t matter if this is something quite rare, because they are all stored as Lat/Lon within the GPS anyway. - Software
# Practice geotagging photos using GPS track timestamps.
def dataCollectingRoutine():
- Mark GPS waypoint; leave GPS running to record track.
# I usually take the automatically suggested waypoint number, rather than fiddling with renaming it each time. - Prepare outcrop for logging/sampling
- Take photographs of:
- General outcrop context
- Logged/sampled section
- Features of interest
- Note the last three digits of each photo’s file name and, if necessary, make a note of what it shows.
- Record data
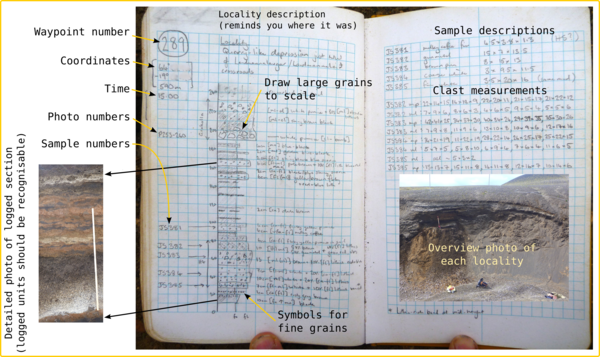
# The following is an example of how I like to lay out my notebook.
# Make observations before interpretations. - Collect samples
# Write the sample number at least 3 times on the bag - Clean up the site
- Take photographs of the notebook pages that you have just written
# This not only acts as a backup, but, because the GPS is running and you can geotag them, you can also access them via links on your GIS maps (see below) - Switch off GPS
def endOfDayRoutine():
- Make a note of any thoughts or wider interpretations that you had
- If you have a laptop in the field:
- Download photos and GPS tracks
- Geotag your photos with GpsPrune
- Backup data to external hard disk
- Pack your samples safely
- Type up spreadsheet(s) with all your localities, samples and measurements.
Other tips
- Use GpsPrune to geotag the photographs of the logs from your notebooks. Then you can find them quickly by location.
- You can view them in your QGIS maps using the “Geotag and Import Photos” and “eVis” plugins:
- You can Easily change coordinate projection systems in Python with pyproj.
- On Unix-type systems (e.g. Linux, Mac) you can download your photos and GPS data very quickly and without the fuss of a mouse and GUI with two simple terminal commands
$ cp -urn /media/camera/ ~/Pictures/Iceland2014/
$ gpsbabel -tw -i garmin -f /dev/ttyUSB0 -o gpx -F ~/Iceland2014/GPS_data/2014-06-05_gpsdata.gpx


For basalts and other dark rocks, use metallic sharpie (indelible ink) so you can also lable the sample, if needed.
Pingback: Easily plot data on a Google Maps background with the QGIS OpenLayers plugin | Volcan01010
Pingback: Four years of volcan01010: Highlights of 2014 | Volcan01010