This is the first post so far that is much more 01010 than volcan. As well as discussing volcanology, an aim of this blog is to share some of the computing methods involving free software that I use each day in my work. I am sure that many people will find them useful, both inside and outside the worlds of science and academia.
ImageMagick
ImageMagick is a command-line program for manipulating images. It is installed as standard on most Linux distributions and can be installed for Windows or Mac from here. Although it can take a while to learn the commands, once you know them you can do things really quickly. Furthermore, you can link them into a script to perform complicated manipulations on lots of images automatically.
This post shows how to use ImageMagick to overlay simple text annotations onto images, and to combine them to produce a multipart figure. In this case, the command line method is significantly quicker and easier than opening a clunky program such as Corel Draw or Adobe Illustrator and doing it by hand.
Annotating the image

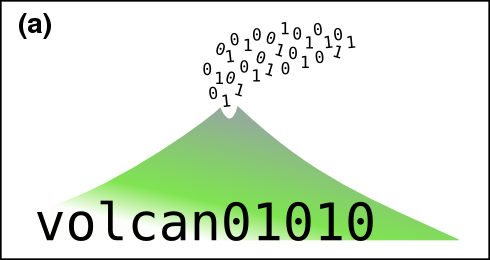
The volcan01010 logo has been annotated with (a) on a semi-transparent white background using the example command.
convert volcan01010_logo_white.png -resize 490x260 \
-background '#ffffffa0' -fill black \
-font Helvetica-bold -pointsize 28 \
label:' (a) ' \
-gravity northwest -geometry +10+12 \
-composite a_logo.png
The command breaks down as follows:
- convert: One of the ImageMagick programs.
- volcan01010_logo_white.png: The input file name.
- -resize 490×260: Resize image to 490×260 pixels wide.
- -background ‘#ffffffa0’: Set the colour of the text background, using hex codes. The last two digits control transparency (00: transparent, ff: opaque). You can also use none.
- -fill black: Set the text colour. Hex codes can also be used.
- -font Helvetica-bold -pointsize 28: Set the font and size.
- label: ‘ (a) ‘: The text to write. You can also use this to label different parts of a figure, or to give an image a title. The extra spaces give a padded box.
- -gravity northwest -geometry +10+12: Text positioning, in pixels from a chosen corner.
- -composite: Overlays the label on the image.
- a_logo.png: Output file name.
Note that the backslashes ‘ \ ‘ are to tell the computer that the code continues onto a new line. This makes it easier to read, especially on the blog. They aren’t necessary if the command is entered on one long line.
It often takes a bit of trial and error to get the correct settings for the font size and position, as they depend on the size of the image. The images here are quite small; a single column image in a scientific journal should be about 1600 pixels wide (for printing at 500 dpi).
Combining the images into a multipart figure

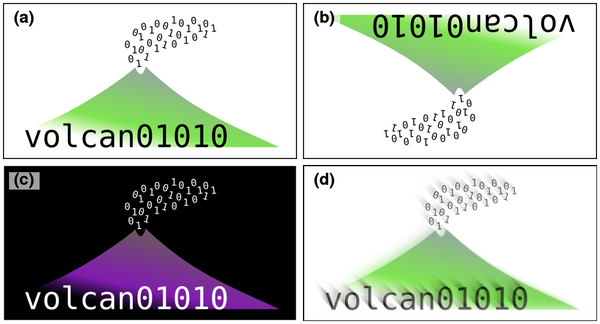
The multipart figure using annotated images, combined with the montage command. (a) Original. (b) Rotated 180 degrees. (c) Negative. Note the semi-transparent background on the annotation. (d) Motion blur.
montage a_logo.png b_rotated.png c_negative.png d_motion_blur.png \
-tile 2x2 -geometry +5+5 multipart.png
The command breaks down as follows:
- montage: One of the ImageMagick programs.
- a_logo.png … d_motion_blur.png: Input file names.
- -tile 2×2: Sets how the images are laid out.
- -geometry +5+5: Controls the size and spacing of the images.
- multipart.png: Output file name.
Other uses for ImageMagick
There are a host of other supremely useful functions in ImageMagick. The convert command is primarily used to convert between formats e.g. jpg, tif, png. Some of the other commands or options that I frequently use are listed below. If you Google them, you can find full instructions.
- mogrify: Change an image in-situ e.g. input file = output file.
- -rotate 90: Rotate image.
- -trim: Remove unnecessary white border from around an image.
- -bordercolor white -border 2×2: Add border of chosen size and colour.
- -colorspace Gray: Convert to grayscale.
- -append: Join two images together.
- -composite: Overlay one image over another (e.g. a logo or watermark).
- -blend: Blend one image into another (e.g. a logo or watermark).
- +repage: Sometimes necessary to scale png files correctly.
- -fuzz 2% -transparent white: Replace white with transparent (in png files).
- -shadow: Add a shadow to an image.


Bam! This got me a batch of labeled pretty pictures just in time for the poster printing and the conference. Thanks so much!
Pingback: All the software a geoscientist needs. For free! | Volcan01010
Pingback: (Almost) 3D view of Háifoss waterfall, Iceland | Volcan01010